
There’s a lot to do within the vanilla valley, however the sky is the restrict when you discover ways to set up Stardew Valley mods. With a lot neighborhood assist, it is a simple sport for first-time modders to dive into, however modding can nonetheless be an intimidating activity.
The modding scene for ConcernedApe’s farming sim is definitely considered one of my favorites, and with primer on the fundamentals possibly it may be considered one of yours, too. That will help you get there, I will stroll you thru the right way to set up Stardew Valley mods with a breakdown of SMAPI (a required framework for loading mods), common obtain assets, and getting began with a mod supervisor.
The best way to set up Stardew Valley mods
This information is organized into three elements. We’ll begin by downloading fundamental Stardew Valley mod instruments, then go on to putting in SMAPI and the Stardrop mod supervisor. Gamers aware of the primary steps can use the navigation on the left to skip forward, or carry on scrollin’ to begin from sq. one.
Associated articles
Obtain fundamentals like SMAPI and Stardrop first
You may want a number of fundamental instruments to put in Stardew Valley mods and get them operating easily. I strongly suggest downloading Stardrop and Content material Patcher, however the Stardew Modding API (SMAPI) is the one absolute should.
To observe together with the information, obtain SMAPI, Stardrop, and Content material Patcher. Extract all three to a central folder for simple entry.
Software
Utility
Required
Description
SMAPI
Mod loader
✅
In style framework for launching Stardew Valley with mods
Stardrop
Mod supervisor
⚠️
Retains information organized with choices for updates or a number of profiles to allow or disable sure mods
Content material Patcher
Mod software
⚠️
Dynamic mod loader, permits mods to load with out changing sport information. Technically not required, however strongly beneficial
Different Textures
Mod software
❌
Related goal to Content material Patcher, however much less frequent
The place to seek out Stardew Valley mods
You’ll be able to obtain particular person mods from common hubs listed under, however get the fundamentals above up and operating earlier than amassing any unwieldy collections.
The place to seek out the Stardew Valley mod folder
Your Stardew Valley mod folder must be within your sport listing. You may wish to have the precise folder listing helpful to ensure SMAPI and Stardrop type mods into the right listing.
OS / Retailer
Listing
Home windows (Steam)
C:Program Recordsdata (x86)SteamsteamappscommonStardew ValleyMods
Home windows (GOG)
C:Program Recordsdata (x86)GOG GalaxyGamesStardew ValleyMods
Linux (Steam)
~/.native/share/Steam/steamapps/frequent/Stardew Valley/Mods
Linux (GOG)
~/GOGGames/StardewValley/sport/Mods
After launching Stardew Valley a minimum of as soon as and putting in SMAPI, you’ll be able to set up mods by inserting them straight into the folder. All mods should be within their very own folder within the mods folder, so your path seems to be like this: /Stardew Valley/Mods/Mod Title
You do not want a mod supervisor, however I like to recommend utilizing Stardrop as a substitute of unzipping and organizing them within the folder your self. Stardrop retains downloads tidy and simple to troubleshoot.
The best way to set up SMAPI (Stardew modding API)
SMAPI is the mod loading framework making all this attainable—your most vital piece of the method. After downloading the loader and launching Stardew Valley vanilla a minimum of as soon as, extract SMAPI’s contents into any listing and double click on the right bat file to put in.
Associated articles
This course of ought to go away you with a brand new mod folder and the StardewModdingAPI.exe inside the sport’s foremost listing.
This is a full step-by-step on the right way to set up SMAPI for Home windows or Linux customers:
Obtain and extract SMAPI
If modding a recent set up, launch Stardew Valley unmodded a minimum of onceDownload and extract SMAPI; the situation would not matterRun the Set up on Home windows.bat file (or Linux)Comply with the console directions to put in SMAPI within the sport directoryNext steps rely in your storefront, both Steam or GOG
Steam customers
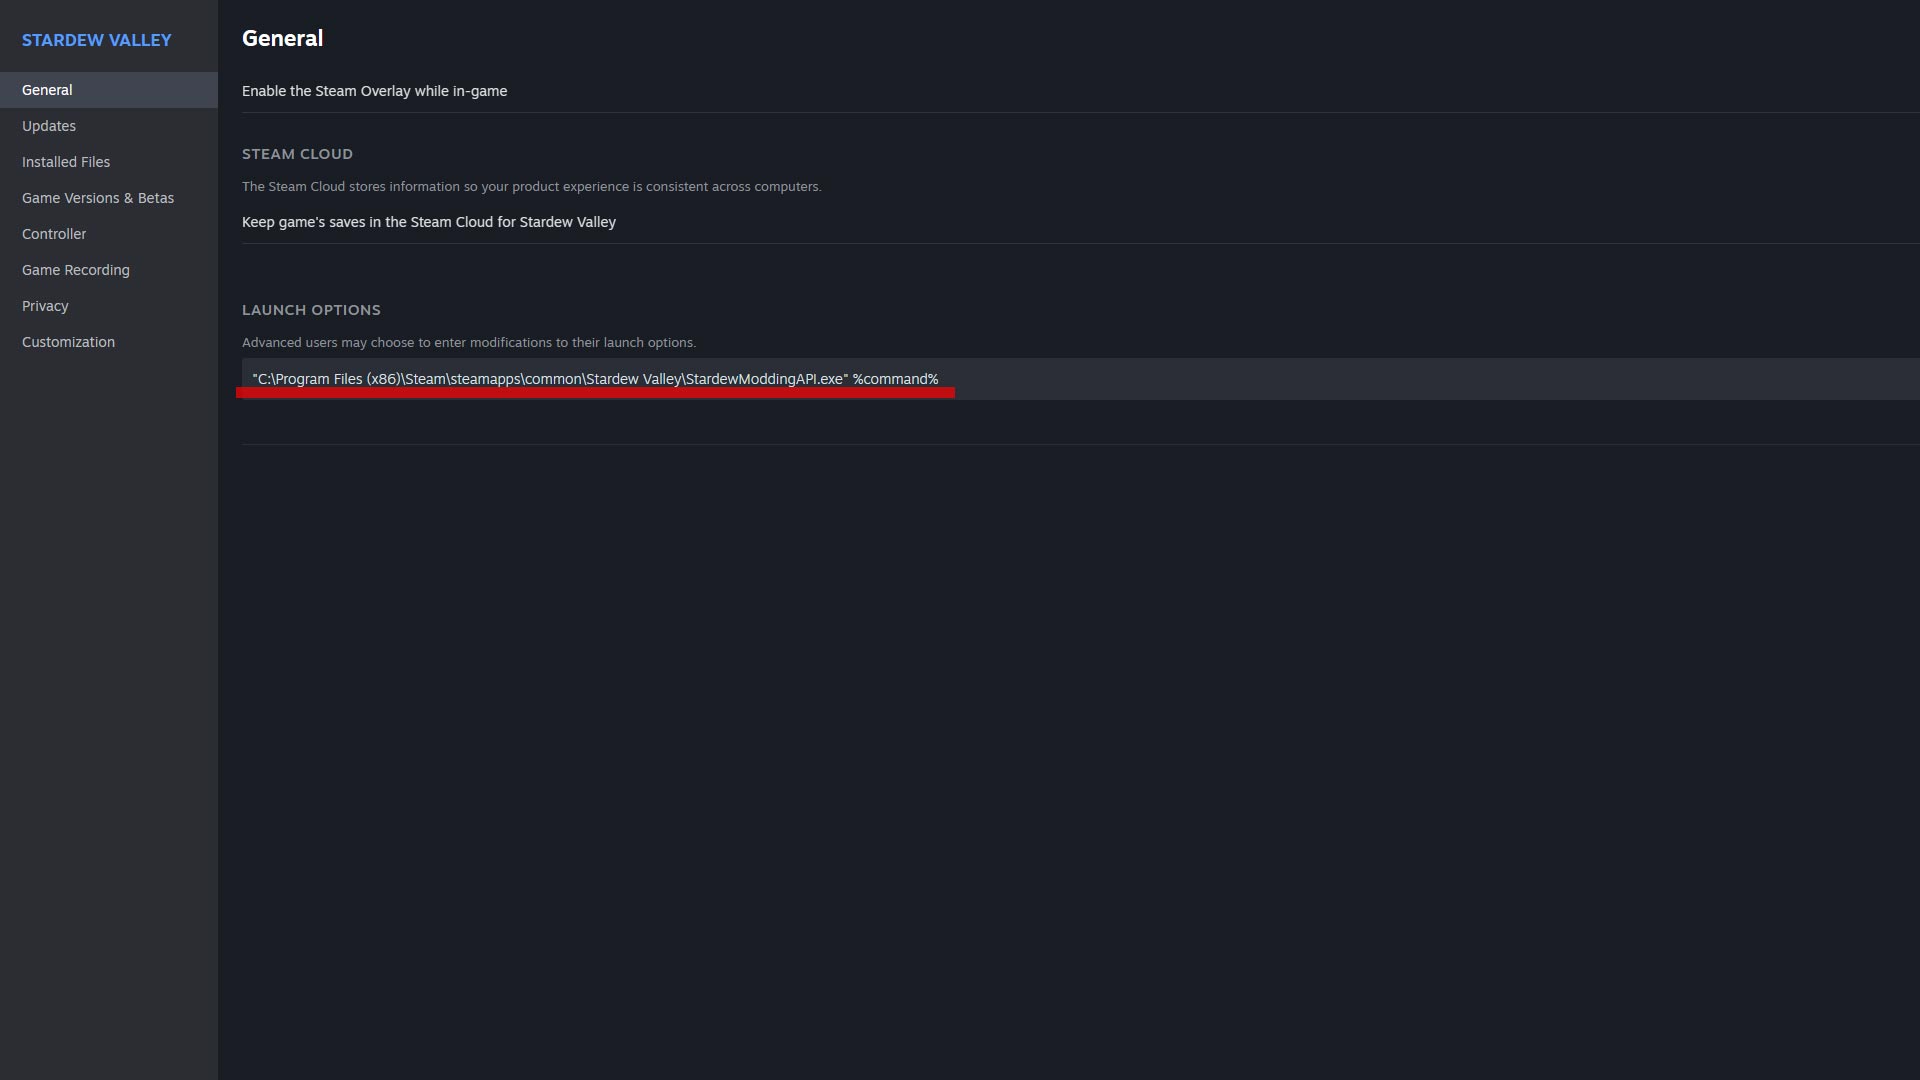
Proper click on Stardew Valley from the Steam libraryUnder Common, search for the Launch Choices textual content field and enter:
“C:Program Recordsdata (x86)SteamsteamappscommonStardew ValleyStardewModdingAPI.exe” %command%
GOG customers
Proper click on Stardew Valley from the GOG librarySelect Handle Set up, then ConfigureOn the Options tab, allow Customized Executables/ArgumentsClick Add One other ExecutableSelect StardewModdingAPI.exe from the sport directoryCheck the Default Executable choice below the modding API
The best way to set up Stardrop mod supervisor
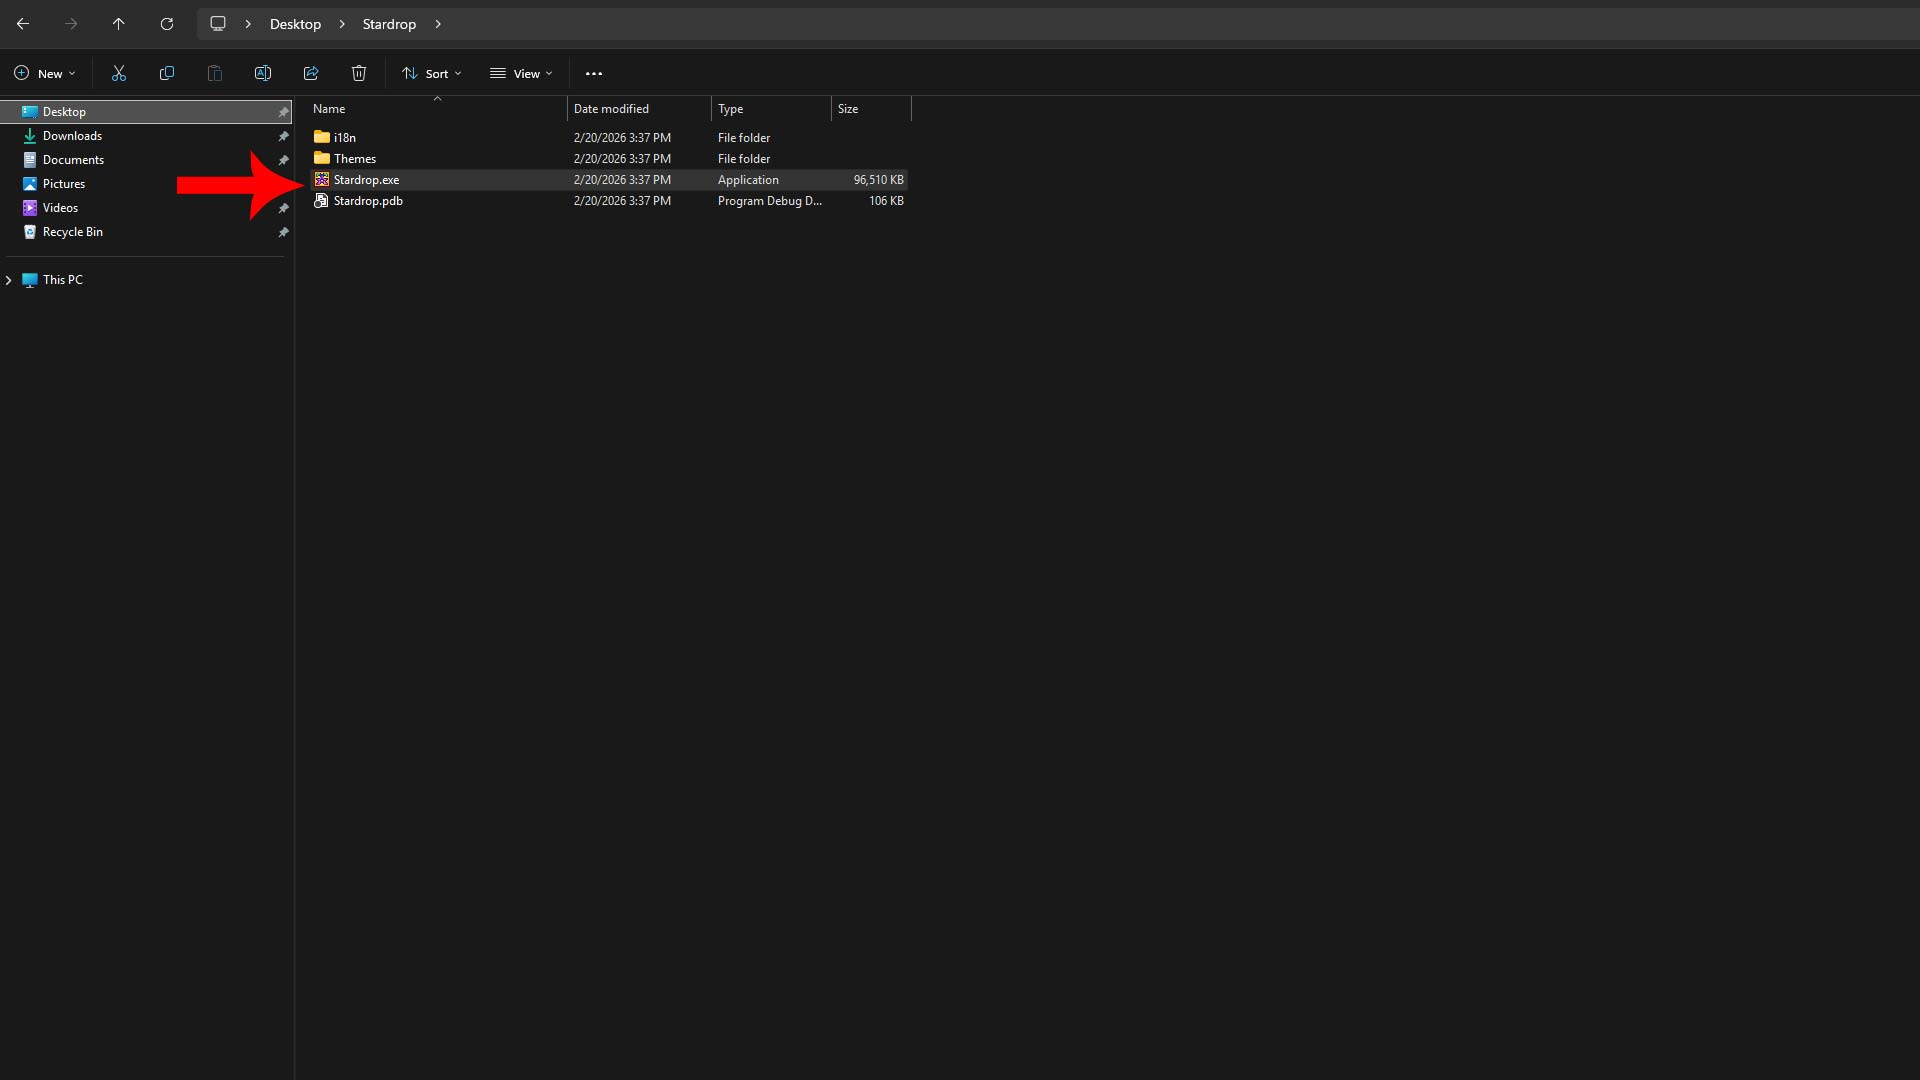
Extract the Stardrop folder anyplace in your desktop—I exploit my Paperwork folder for safekeeping—and double click on Stardrop.exe to launch the mod supervisor for the primary time. That is the software that may set up, take away, allow, or disable mods for you. It makes the method 1,000,000 occasions simpler.
Opening Stardrop for the primary time
When loading Stardrop for the primary time, the exe asks if you want to “affiliate the NXM protocol with Stardrop” to robotically set up downloads from Nexus Mods. I all the time do that, however it’s non-obligatory.
Sure – Mechanically obtain and set up a mod after clicking a Nexus linkNo – Manually add information into Stardrop your self
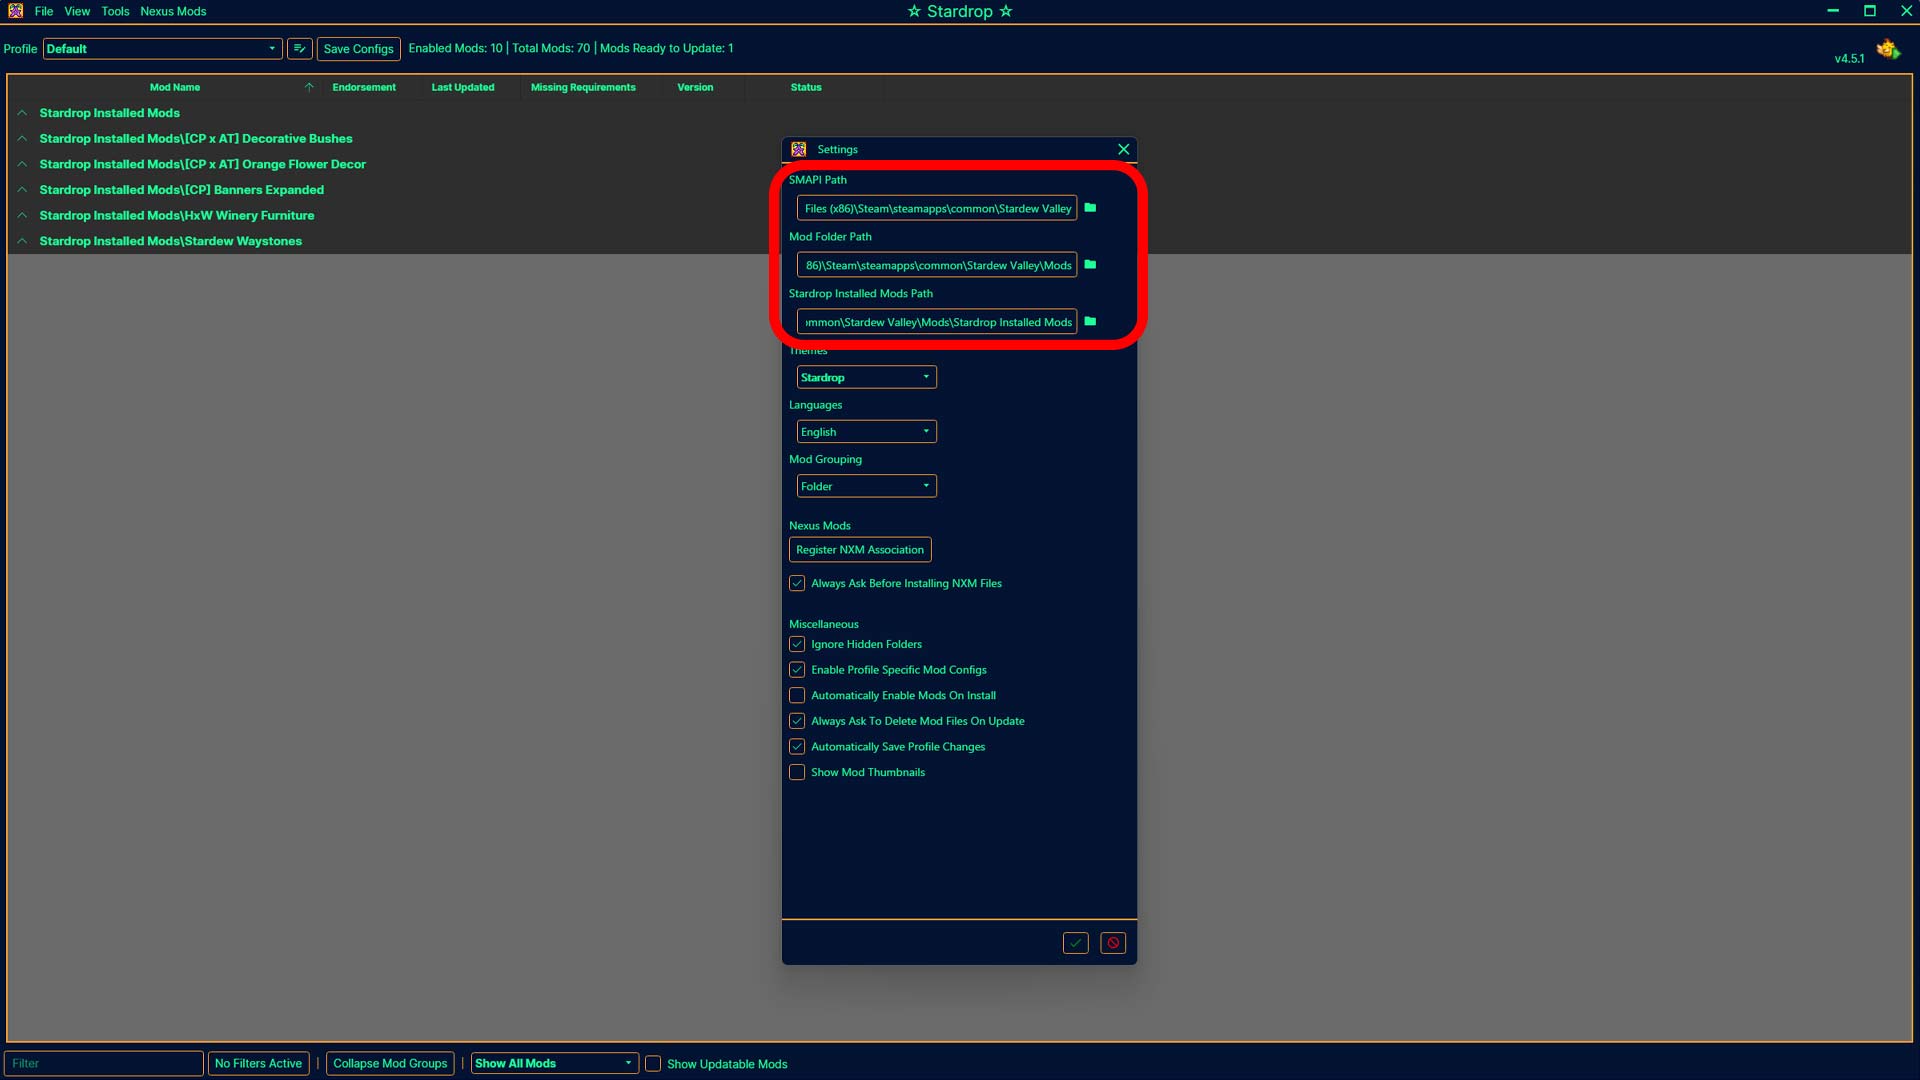
Configuring Stardrop directories
Navigate to View > Settings and test all three file paths for SMAPI, the Stardew Valley Mod folder, and a brand new Stardrop Put in Mods folder. The brand new addition is the place Stardrop will dump your mods.
Path
Instance Folder Path Setup
SMAPI
C:Program Recordsdata (x86)SteamsteamappscommonStardew Valley
Mod Folder
C:Program Recordsdata (x86)SteamsteamappscommonStardew ValleyMods
Stardrop Put in Mods
C:Program Recordsdata (x86)SteamsteamappscommonStardew ValleyModsStardrop Put in Mods
Putting in mods by way of Stardrop
In case you do not use the Nexus Mods protocol, you’ll be able to drag and drop zipped mods straight into Stardrop’s interface or click on File > Add Mods and choose the compressed file. Stardrop will unpack it and deal with the remainder.
Along with your mods loaded in Stardrop, click on the field beside your new additions to allow them. If you wish to disable a mod, uncheck the identical field. Click on Save Configs if you make any modifications and restart the sport.
The best way to set up Content material Patcher and Different Textures
You’ll be able to robotically set up Content material Patcher by way of Stardrop, or go to Nexus Mods for a separate obtain. Content material Patcher would not do something as a standalone mod, however tons of modders use it to load customized property with out altering the bottom sport information.
Different Textures is much like Content material Patcher and so they’re suitable with one another, however sometimes works by way of in-game gadgets just like the Paint Bucket or Scissors whereas offering a number of choices for personalisation. That is not an choice with Content material Patcher.
Function
Content material Patcher
Different Textures
Replaces authentic sport file
❌
❌
Restrict per asset ID
Just one might be lively at a time
Limitless
Enabled by way of in-game merchandise
❌
✅
Ought to I exploit Content material Patcher, Different Textures, or each?
You need to use Content material Patcher and Different Texture mods collectively, however I might prioritize putting in Content material Patcher over all the things else since so many modders use it.
When downloading mods, search for abbreviations like (CP) for Content material Patcher or (AT) for Different Textures and choose the right model(s) relying on the way you wish to use the retexture.
CP mods are sometimes good for static components you do not plan on altering loads, however consider you’ll be able to solely have one CP mod at a time for a similar asset. AT mods can overwrite CP modifications or one another utilizing gadgets and different in-game menus on the fly, so you’ll be able to have a number of AT information.


