
On this Path of Exile 2 article, we will likely be having a look at easy methods to put collectively the Smashing Titan Warrior construct so that you can use to get into the late recreation or endgame of the sport.
Path of Exile has turn out to be infamous for the sheer variety of expertise and construct prospects out there, and the sequel follows swimsuit with an in depth ability tree and a large number of ability gems.
This information is right here that will help you get by all that and lay out a path so that you can observe as you attain the tip of the marketing campaign and put together to your merciless playthroughs or endgame.
Introduction
The Smashing Titan is a Warrior construct profiting from our energy to do excessive harm along with your slam expertise, dealing harm over an enormous space whereas additionally having nice crowd management. This construct focuses on shortly taking down teams of enemies with highly effective slams and earthquakes, taking full benefit of the mace weapon.
Starter Class
Firstly, for this construct, our base starter class is the Warrior class, which is one among the many seven out there on the time of constructing this information.
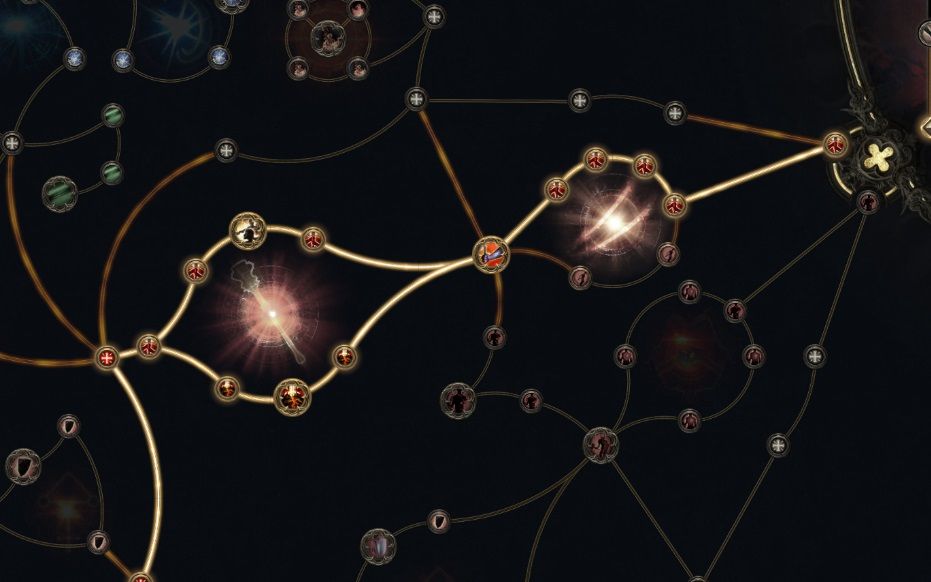
On the expansive ability tree, the Warrior class will begin on the southwest aspect. This aspect of the ability tree consists primarily of passives associated to armor, stun buildup, totems, and flat melee harm. For this explicit construct, we will likely be specializing in getting nodes that improve our melee harm in an effort to maximize our harm output.
Passive Abilities
For the passive ability tree, this construct is comparatively simple, as we will likely be focusing primarily down the southwestern a part of the tree, emphasizing growing our melee harm.
We will likely be taking nodes similar to Brutal and Smash alongside the best way, growing our harm and stun buildup. We may also be taking the Reverberating Affect node, as it can improve the realm of impact of our assaults, enhancing our slam expertise.
We will likely be taking all of the nodes from one of many earlier two-handed weapon harm ability teams that we come throughout, as this may improve our harm when utilizing two-handed weapons by as much as 100%.
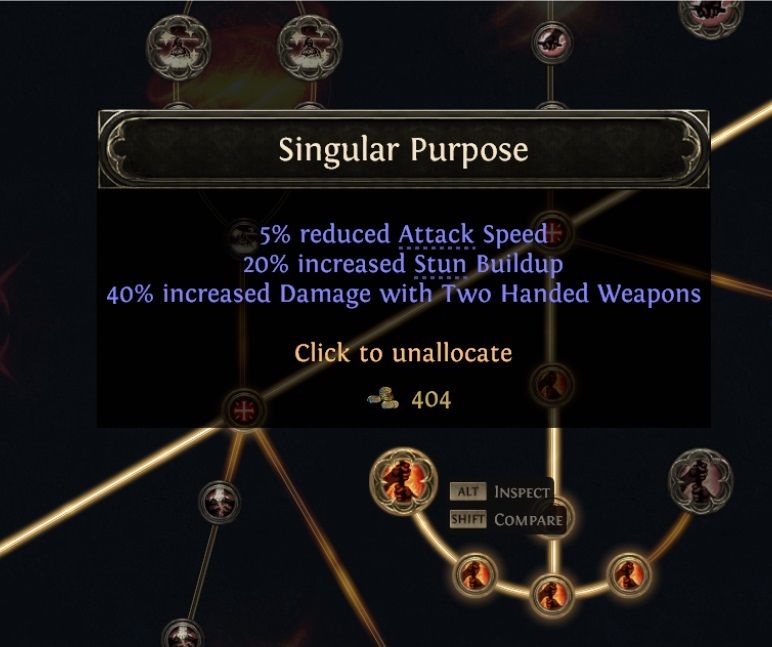
Should you choose utilizing one-handed weapons, you’ll be able to take the ability group on the alternative aspect, which can give 50% elevated harm along with a rise in assault velocity when utilizing one-handed weapons.
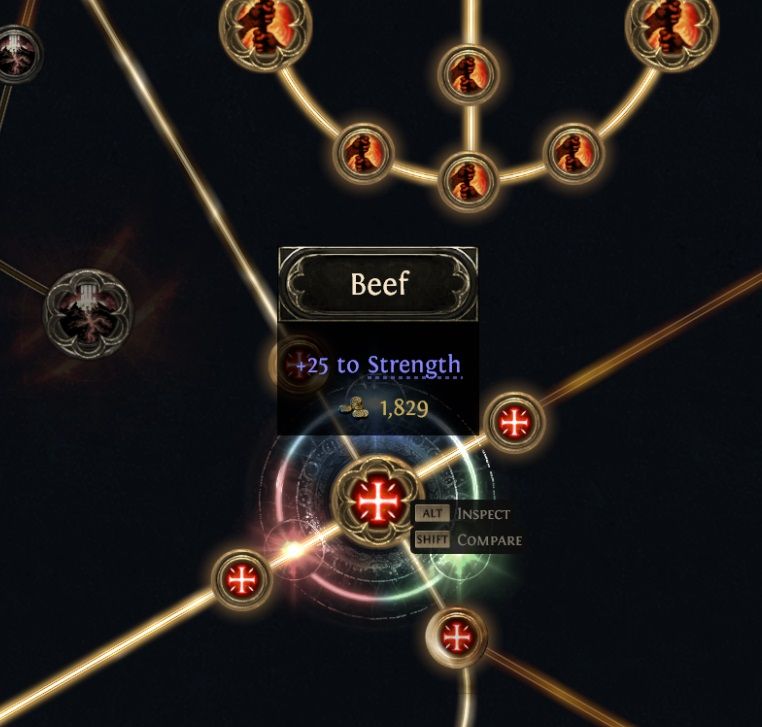
Following this group, we’ll take the Round Beef passive ability group that may give us a complete of 57 factors within the Energy attribute, which can go a great distance in each growing our most life worth and the harm scaling.
After this ability group, we’ll proceed alongside the axis till we attain the outer ring of the ability tree. Initially, we’ll work our method by a department which can improve our Energy worth by going for the Brute Energy node.
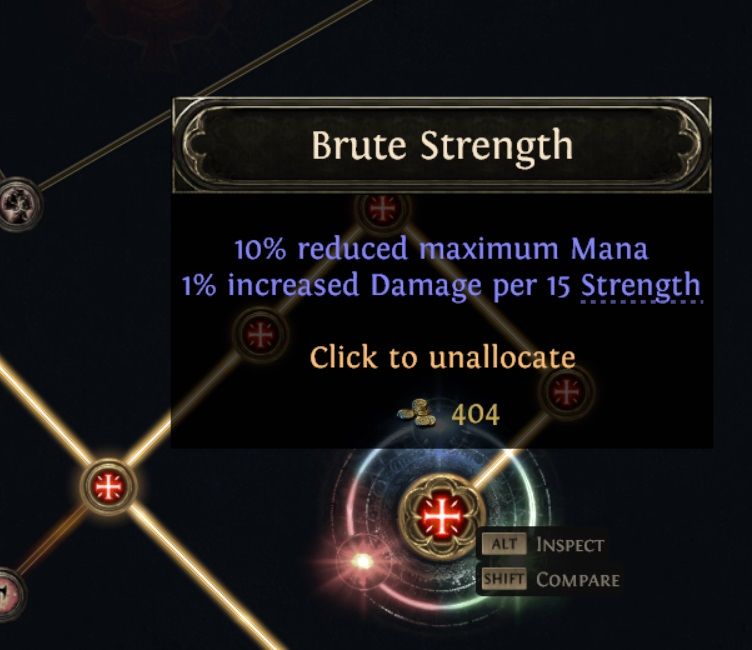
This department will improve our Energy attribute by a complete of 48 whereas additionally growing our harm by 1% for each 15 factors in our Energy attribute, enabling this construct to scale simply into the late and endgame.
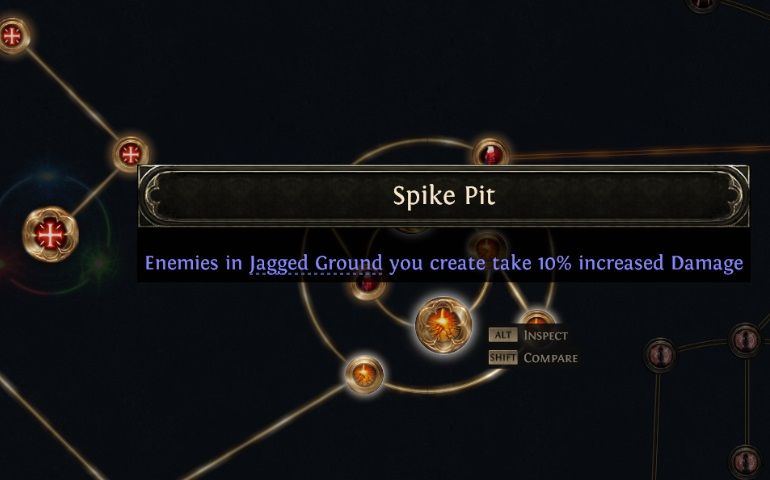
After Brute Energy, we’ll work our method towards a close-by ability group which can improve the effectiveness of the Jagged Grounds we will likely be inflicting with our expertise by going for the Spike Pit and the Perforation passive nodes.
jag
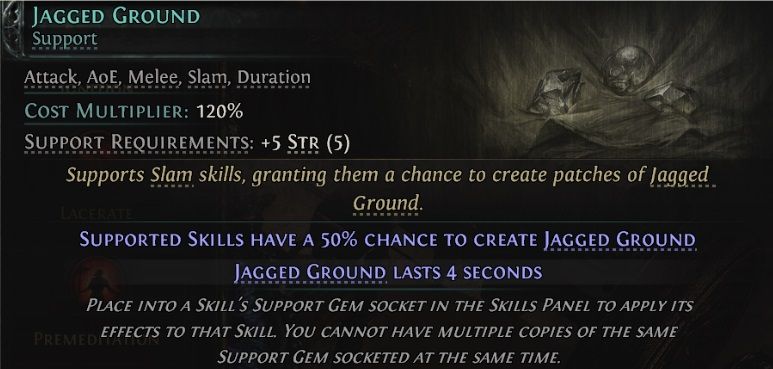
The Spike Pit and the corresponding minor nodes will improve the magnitude of the Jagged Floor and improve the harm taken by enemies inside the grounds, whereas Perforation and the corresponding nodes will improve the prospect to inflict bleed and worsen that bleed when enemies are caught inside the Jagged Floor.

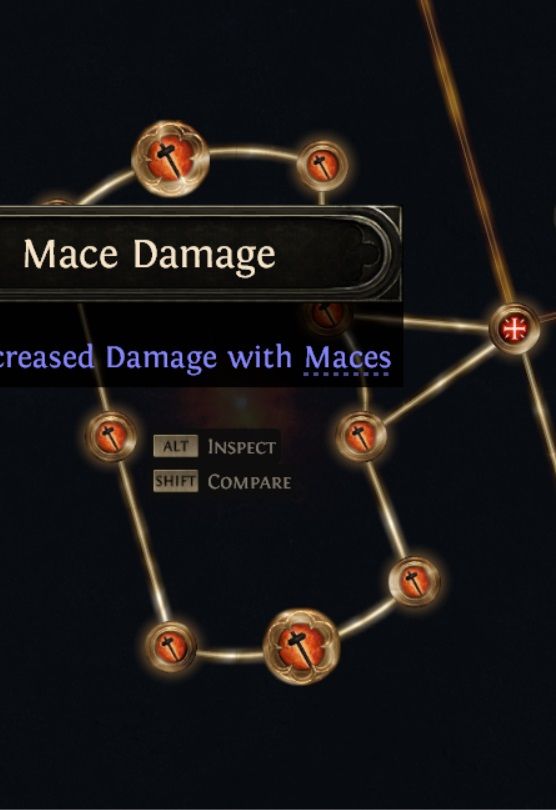
The subsequent group of expertise will significantly improve the harm we do with this construct, as they are going to improve the harm we cope with mace weapons. Along with the rise in harm, it can help you trigger aftershocks when utilizing your mace expertise, serving to you with mapping and clearing mobs as you progress by the sport.
Your path down the ability tree will principally be a straight shot down the southwestern department and can focus primarily on taking nodes that improve our melee harm. Along with the above-mentioned ability teams, we will additionally work in direction of nodes that give us armor or give us extra Rage, which can assist us scale into the late recreation.
For this construct, we’ll go together with the Titan ascendancy for the Warrior.
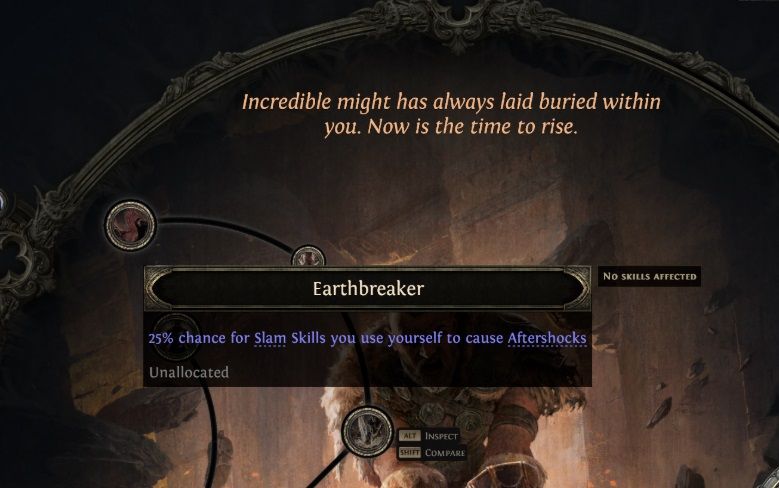

It is because we’re taking the Earthbreaker, which can give all our slam expertise a 25% likelihood to trigger aftershocks, which helps with our harm output, and Ancestral Empowerment, which can improve the harm by 30% and the realm of impact by 20% of all second slam expertise we use by ancestrally empowering them.
Energetic Ability Setups
For the lively expertise for this construct, we will likely be utilizing the mace weapon — both two-handed, because the two-handed selection works rather well with this construct — and you’ll go for the one you like.
The principle rotation of the talents for this construct will likely be quite simple, counting on expertise that can be utilized from the beginning of the sport. First, we will likely be utilizing the Earthquake ability so much as the start a part of our fundamental harm supply for this construct.
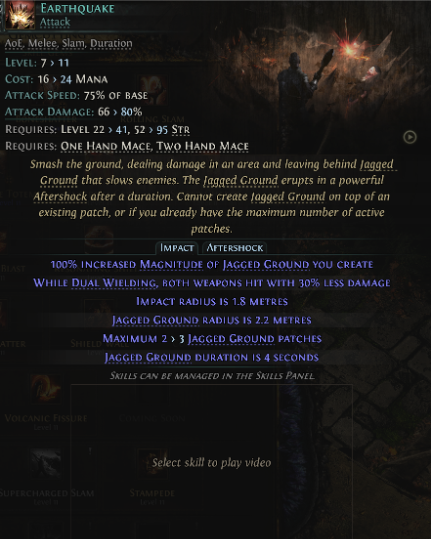
This ability will create a Jagged Floor space when struck, which can gradual enemies in addition to deal harm.
This floor may also erupt in an aftershock by itself, dealing a second supply of burst harm. However the primary crux of this construct is after we pair this ability with the following ability, the Shockwave Totem.
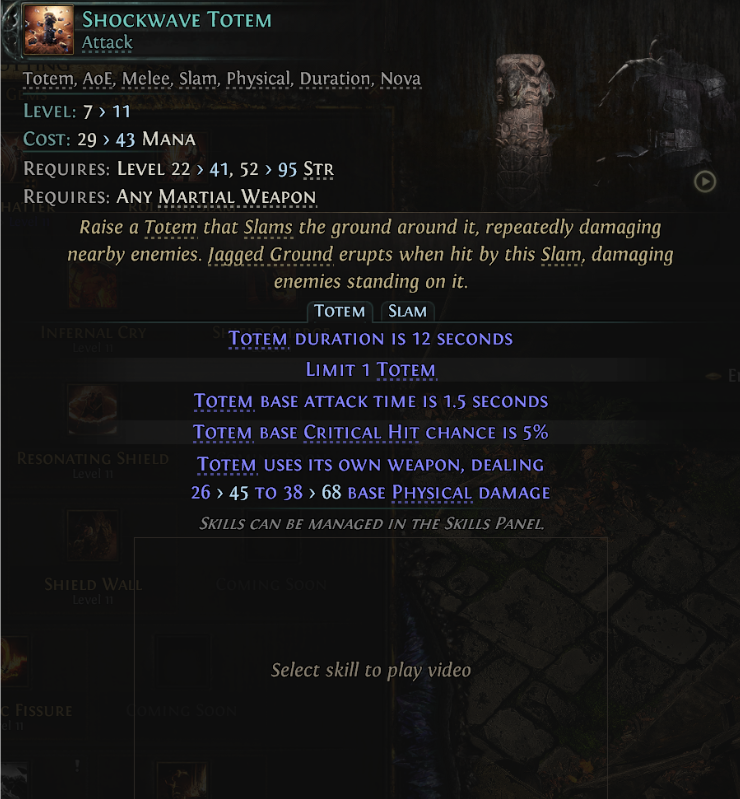
Because the Shockwave Totem slams the bottom repeatedly, it can additionally set off the aftershock of our Earthquake ability, permitting us to deal large quantities of big space harm with this wonderful combo.
Since this harm scales with Energy, and each the realm and harm are elevated by nodes similar to assault space, this explicit combo scales rather well into the late recreation.
One other one of many expertise we will likely be utilizing very often is the Rolling Slam, which can carry out two strikes that may each harm and trigger quite a lot of stun buildup.
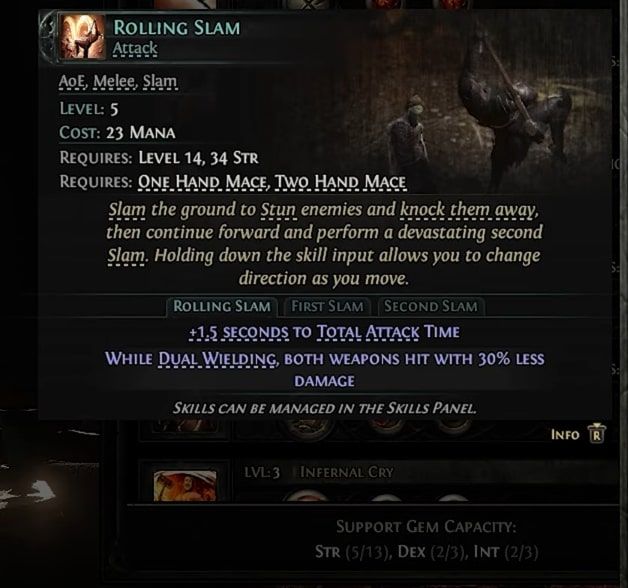
Though this ability by itself doesn’t cowl an enormous space, it’s nonetheless nice for cleansing out concentrated teams of enemies. As well as, the Rolling Slams may also set off aftershocks from the Jagged Floor left by our Earthquake ability, including to the harm of each expertise.
The subsequent ability which can enable us to simply end off enormous teams of enemies is Boneshatter.
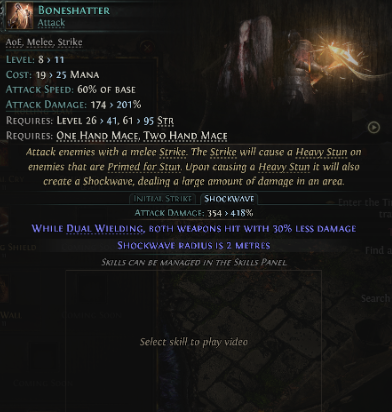
This ability works extraordinarily effectively as a result of it can ship a shockwave that may amplify your harm by a large quantity, permitting it to deal excessive quantities of burst harm to teams of enemies.
The subsequent ability which is nice for coping with each bosses and mobs is the Supercharged Slam ability.
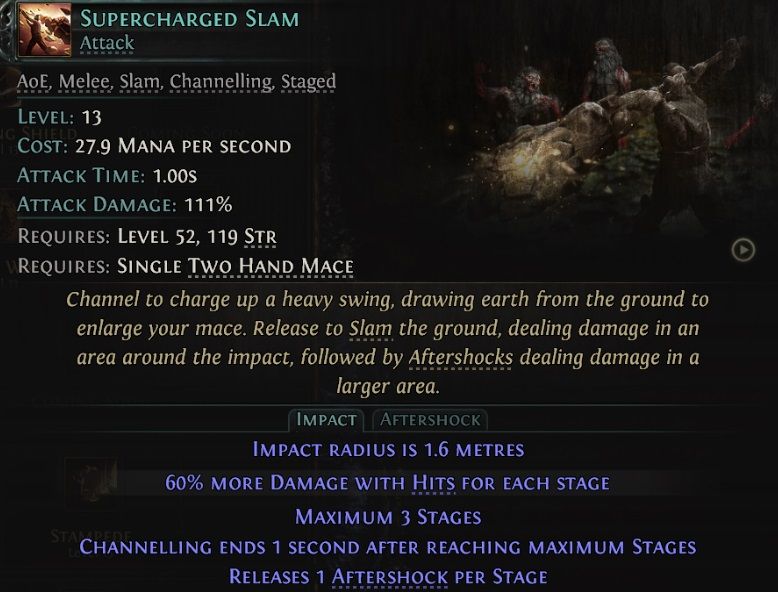
It is a channeled ability that you could cost as much as 3 levels and can unleash highly effective shockwaves upon slamming, dealing large harm in an enormous space, which is assured to take out mobs and construct an enormous quantity of stun in opposition to bosses.
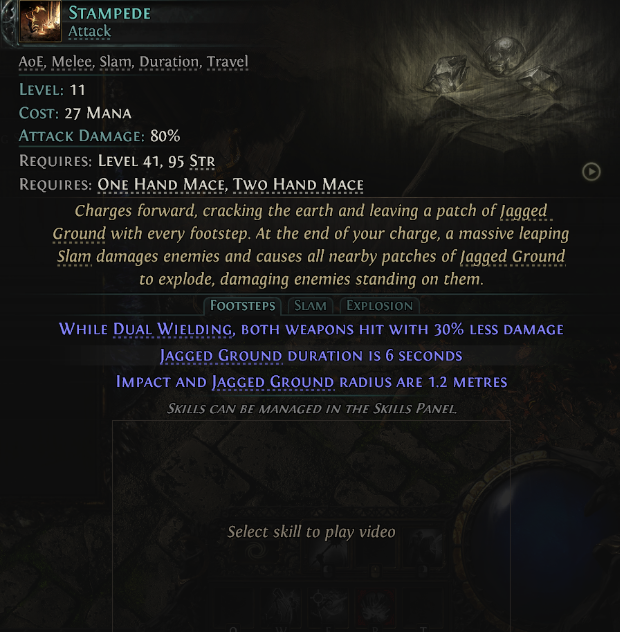
One other nice ability to make use of is the Stampede ability, as you’ll cost by most enemies, leaving Jagged Floor which your Shockwave Totems can set off for aftershocks, permitting you to construct up stun shortly and deal harm in an enormous space.
st
Lastly, the lively ability that may give this construct versatility is the Ancestral Totem ability.
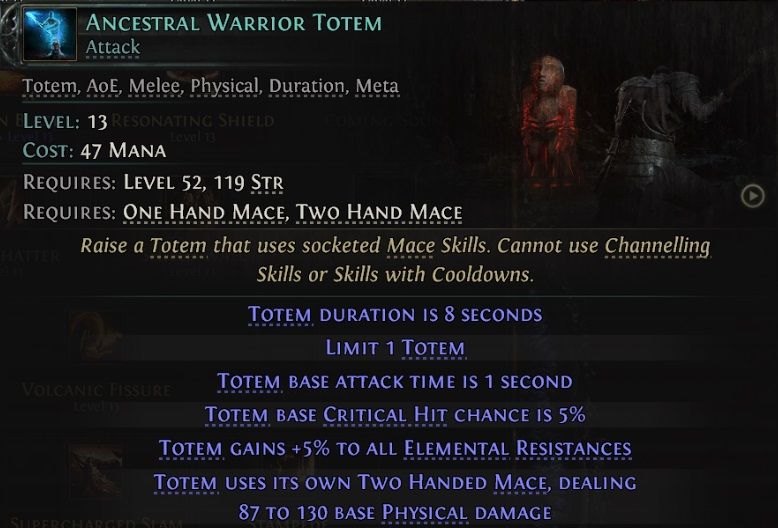
When outfitted with non-channeled mace expertise, this totem will summon an Ancestral Spirit that may use slotted expertise, providing you with entry to some expertise with out you having to make use of them your self.
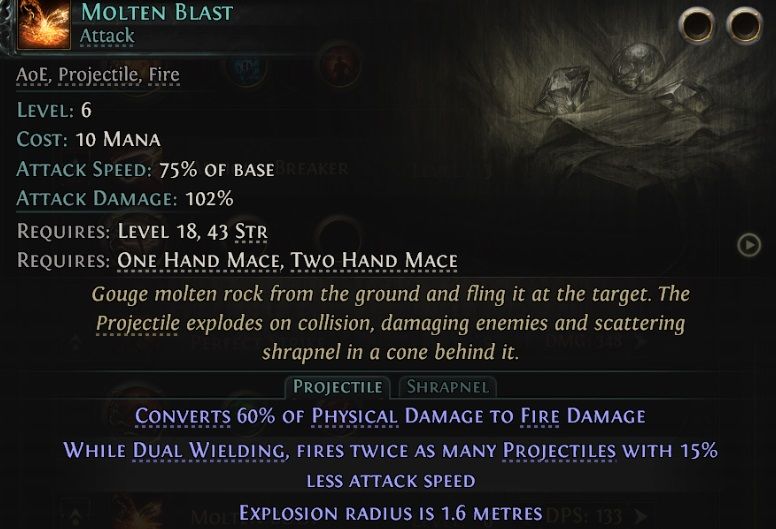
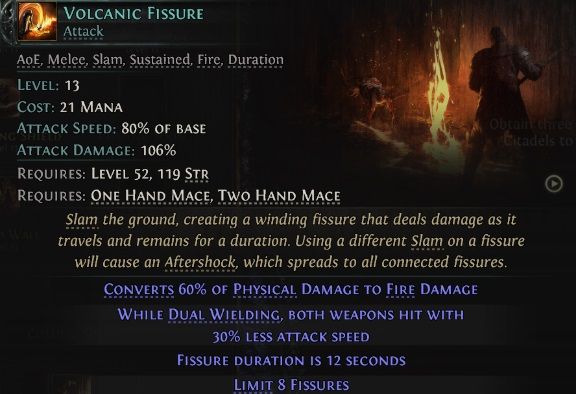
Slotting within the Molten Blast and Volcanic Fissure expertise works rather well as a result of the Molten Blast will give a ranged possibility, permitting the totem to break enemies from vary, and the Volcanic Fissure won’t solely initially harm with the fissures attributable to the spirit — these fissures could be triggered to launch lava that may also deal extra harm in tandem with our aftershocks, permitting us to combo off each expertise.
Spirit Gems and Abilities
For this construct, there are two choices for Spirit expertise, that are a selected set of expertise that use Spirit as a useful resource to equip and use.
The primary is the Herald of Ash, and this persistent buff will trigger an explosion that ignites each enemy in vary everytime you Overkill an enemy.
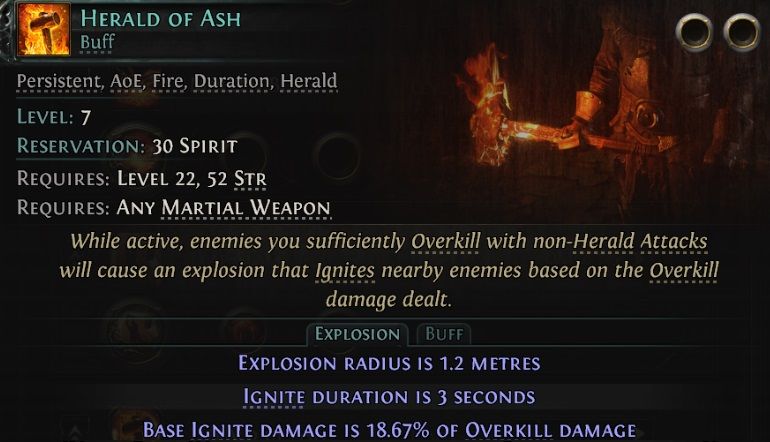
Owing to the large quantity of Energy now we have and the harm scaling with the attribute, we will Overkill mobs of enemies simply.
The opposite helpful Spirit ability is the Time of Want ability.
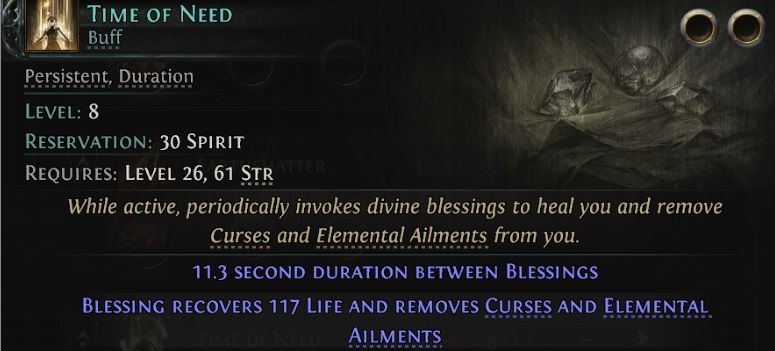
That is an aura-type ability that may restore life and heal from curses and illnesses at common intervals, which is absolutely nice for survivability when utilizing this construct, as now we have little in the best way of bolstering our survivability when utilizing this construct.
Assist Gems
For this construct, we will likely be trying to maximize the effectiveness of our slam expertise, enabling us to cope with our enemies swiftly.
For our first ability, Earthquake, we will likely be utilizing the Persistence and the Martial Tempo assist gems.
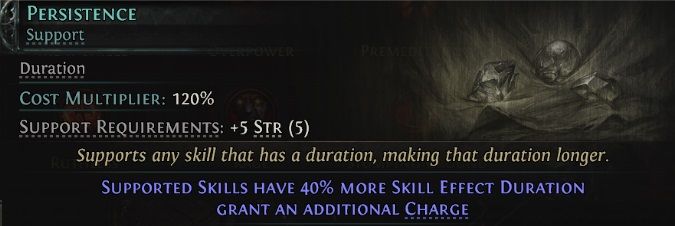
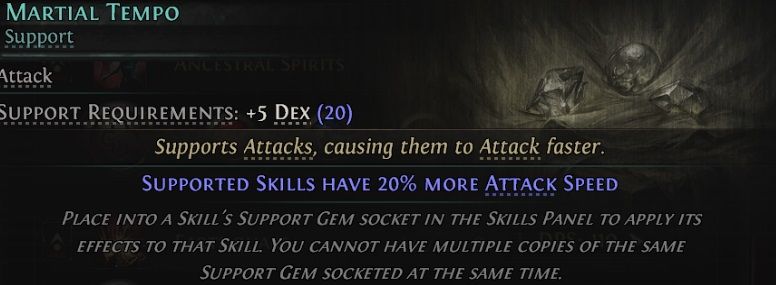
The Persistence assist gem will improve the period for which the Jagged Floor stays on the bottom from our strikes, and the Martial Tempo assist gem will enable us to strike sooner with our ability.
Subsequent, with the Shockwave Totem, we will likely be utilizing the Overabundance and the Jagged Floor assist gems.
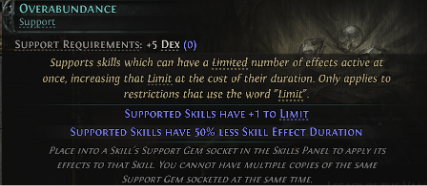
The Overabundance gem will enable us to place down two of the Totems on the similar time, permitting us to set off aftershocks from our Jagged Grounds over a wider space, whereas the Jagged Floor assist gem will give the Totem itself a 50% likelihood to spawn the Jagged Floor, including to the variety of aftershocks triggered.
Relating to our Rolling Slam ability, we’ll slot within the Overpower assist gem and the Unabating assist gem.
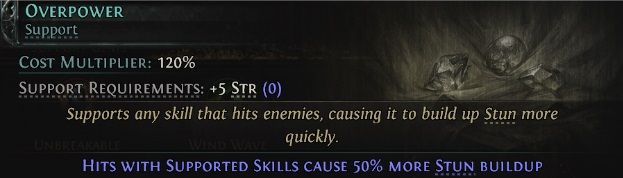
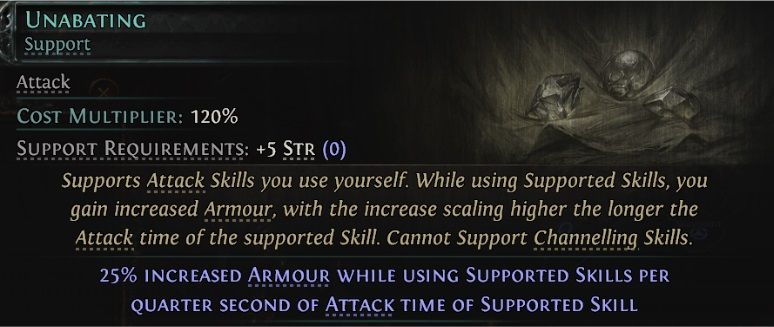
The Overpower assist gem will improve the stun buildup of the ability, permitting us to shortly combo right into a stun, and the Unabating assist gem will assist with our maintain by growing the armor by 25% as we’re rolling throughout mobs of enemies.
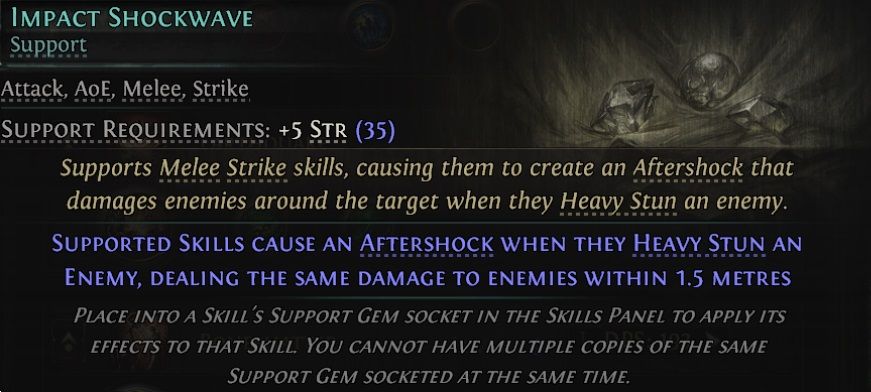
For the Boneshatter ability, utilizing the assist gem Affect Shockwave actually helps, because it will increase the shockwave launched from the heavy stun when utilizing the ability.
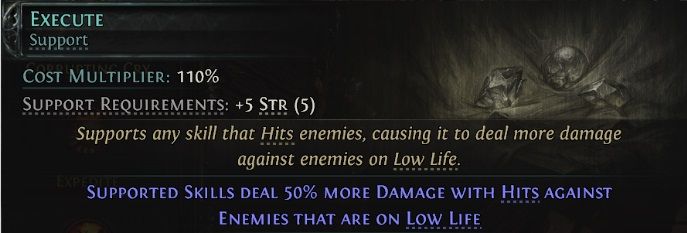
The harm is additional complemented through the use of the Execute assist gem as effectively with the Boneshatter ability, as their well being will likely be low when their stun bar has been constructed up by all of your different spells.
With our Supercharged Slam ability, we will likely be slotting within the Window of Alternative and the Burgeon assist gems.
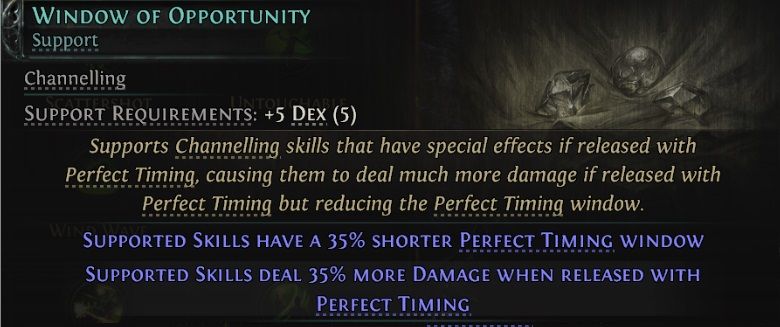
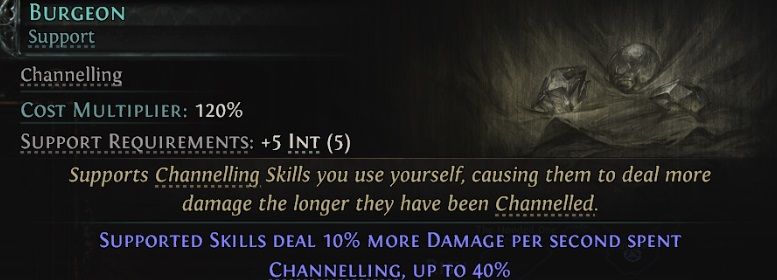
The Window of Alternative will shorten the time it takes for our Slam to succeed in the Supercharged channeled state, and the Burgeon assist gem will improve the harm it offers by as much as 40% relying on the time channeled when utilizing the ability.
Subsequent, with our Stampede ability, we will likely be utilizing the Unbreakable and the Unyielding assist gems.
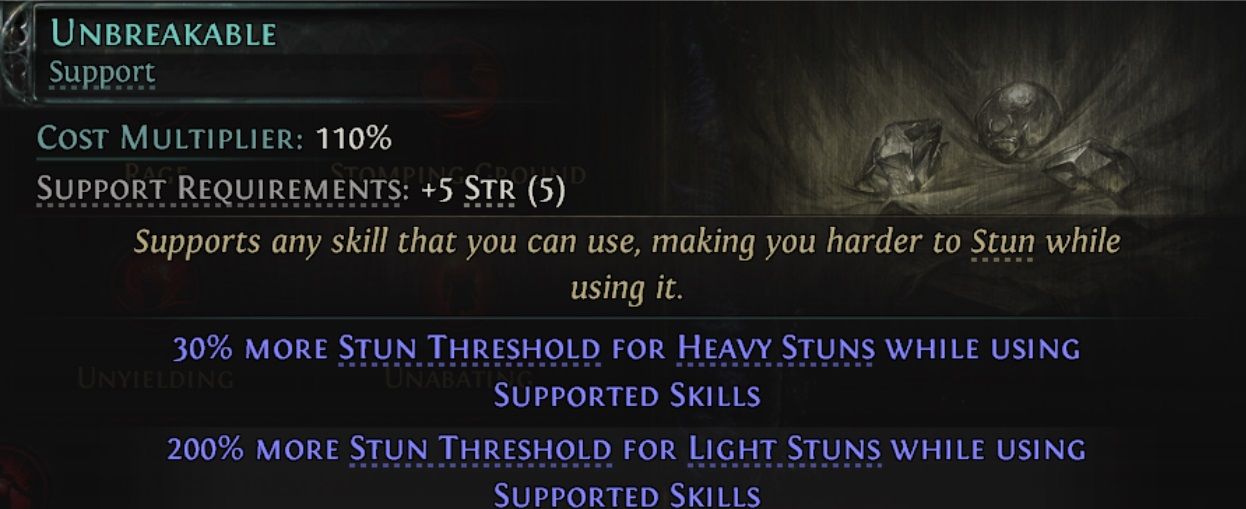
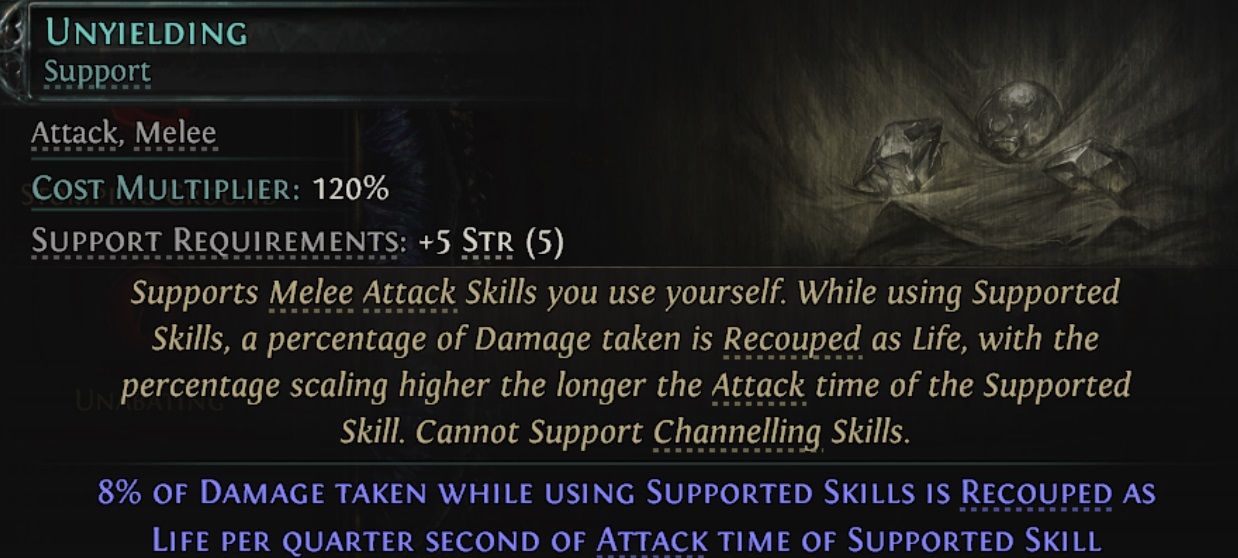
The Unbreakable assist gem will improve the Stun Threshold for each heavy stun and lightweight stuns, significantly lessening the likelihood of getting interrupted whereas utilizing the ability, and the Unyielding assist gem will enable us to recoup a few of the harm now we have taken whereas stampeding throughout our enemies.
For our Spirit gem expertise, with the Herald of Ash, the assist gems Magnified Impact and Everlasting Flame will improve the effectiveness of the passive.
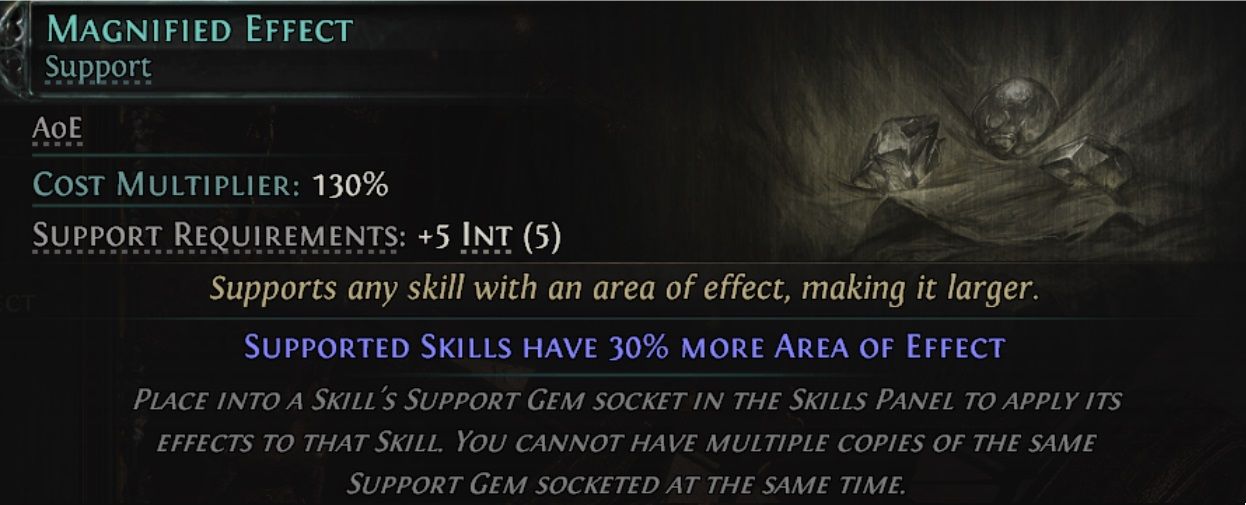

The Magnified Impact assist gem will improve the realm of impact of the explosions out of your Overkills, and the Everlasting Flame assist gem will improve the Ignite period on the enemies, serving to with clearing out mobs.
With our Time of Want Spirit gem ability, we will likely be utilizing the Vitality and Quick Ahead assist gems.
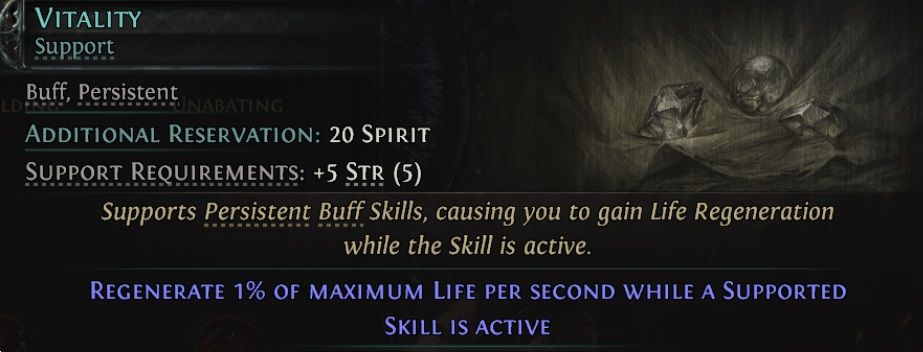

The Vitality gem will improve the therapeutic from the ability, as it can additionally regenerate 1% of our most well being along with the restoration supplied by the ability itself.
The Quick Ahead assist gem will shorten the period between every restoration triggered by the ability, serving to with our sustainability as we throw ourselves into the mobs of enemies.
Gear and Tools
The construct prioritizes a high-physical-damage two-handed mace and armor-based gear with life, resistances, and Energy.
Uncommon gadgets with +1 to melee expertise or elevated stun period modifiers will actually assist when placing this construct collectively, as they are going to reinforce the effectivity of this construct.
Gear having life leech may also assist with the maintain of this construct, as we will likely be taking quite a lot of harm being a melee class. Additionally, gear that provides extra Energy attributes and armor will assist this construct to scale comfortably into the endgame with out operating into hassle or falling off.
Leveling Information
When going by the story and you’re leveling, you’ll be able to simply clear mobs by getting into with a Rolling Slam, afterwards ending off with Boneshatter.
This combo will help you undergo a lot of the mobs with out stress throughout your playthrough, so long as you don’t put your self right into a nook and get surrounded by an amazing quantity.
Associated
Path of Exile 2 The Bloodletter Construct
On this article, we’ll be having a look at easy methods to put collectively The Bloodletter construct for stepping into the endgame
Placing nodes into stun buildup and space of assault helps, as it can allow you to cope with extra enemies simpler, as it can help you heavy stun utilizing Boneshatter extra simply.
As you stage up, you’ll be able to both begin investing into some armor nodes or life leech to offer some survivability. One vital factor to notice is that, along with the assist gems I discussed above, this construct can profit from some extra Dexterity assist gems, and it’ll assist in the event you’ve put some attribute factors into Dexterity.
Mapping and Bossing
Though this construct performs effectively in each bossing and mapping, coping with bosses is usually a problem, being a melee class requiring you to be extra aware of the boss’s assaults.
This construct has the benefit of getting the choice to deal constant harm by the aftershocks of the Jagged Grounds left behind by your Earthquake ability and the Totems, permitting you to maintain inflicting harm whilst you dodge assaults.
You’ll need to time your expertise extra rigorously between the assaults and ensure to review their assault patterns, as this would be the distinction between failure and success when going up in opposition to bosses.
Endgame Scaling and Optimization
Endgame scaling is enhanced by cluster jewels that improve Armor Worth, Space of Assault, and Assault Harm.
The construct has nice choices to scale by investing into both Warcries or Rage, and advantages from high-Energy gear to additional increase life and melee harm.
This construct performs effectively in SSF and Hardcore, due to its excessive harm and excessive survivability, due to the excessive armor worth. It isn’t reliant on costly uniques and provides nice scaling into the endgame.
So, this wraps up my information for the Smashing Titan Warrior construct for Path of Exile 2. I hope you discovered this information useful, and you probably have any solutions or suggestions, be at liberty to depart them within the remark part.


![[DEV] When your 14 yr previous cousin asks you to construct a "film bomb" defusal sport…](https://i2.wp.com/external-preview.redd.it/MWpyZDVhNmg4c3NnMXY7uRCzVu1ZowuOWpFZI7G10xM9ZHHJ6-WOUMiOttr8.png?width=640&crop=smart&auto=webp&s=8cdad7ea87786abba7b8ee1b8c9dc2ca17d9242c&w=120&resize=120,86&ssl=1)